App and web generation 3 - A checklist for getting started
The app object in BRP Configuration controls both the app and the web.
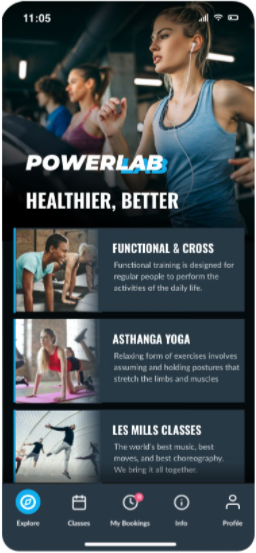
App
Functionality
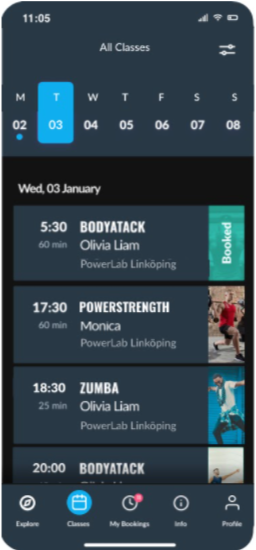
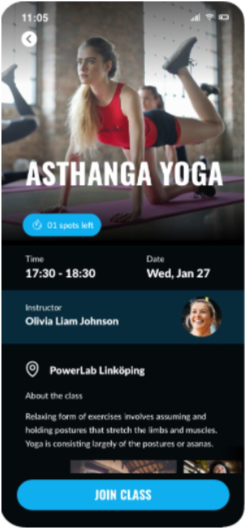
- Book classes
- Buy subscriptions
- Onboarding questions
- Buy services
- Buy value cards
- Add class or service booking to calendar
- Push notifications
- Plain text
- Landing page
- Mobile entrance
- Shopping cart
- My pages
- Payment
- Card
- Swish
- Value card
Requirements
- BRP version 2021.1601 or later
- A license for the third generation app
- Send your BRP contact a logotype for dark theme ("negative logo") with white or bright text that works on a dark background
- The dark theme is used in the app, but not on the web.
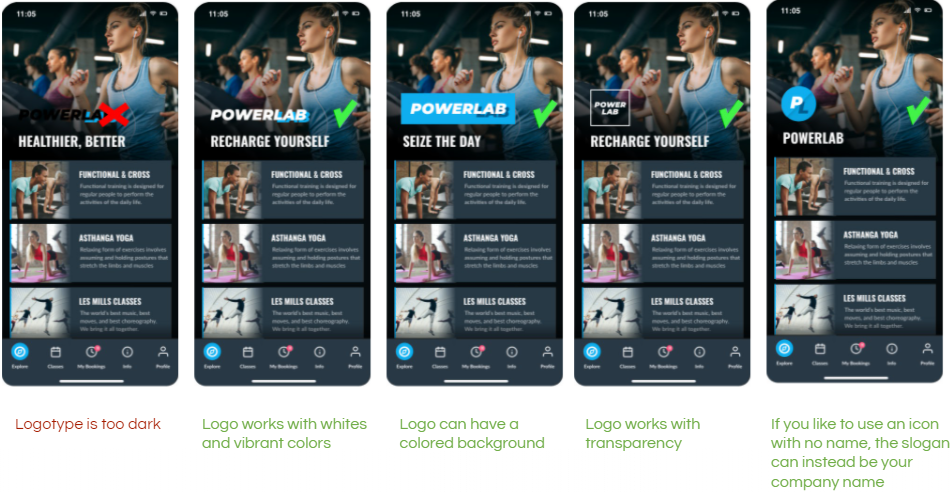
- Alternative 1: Vector based format
- Alternative 2: High resolution transparent PNG
- The dark theme is used in the app, but not on the web.
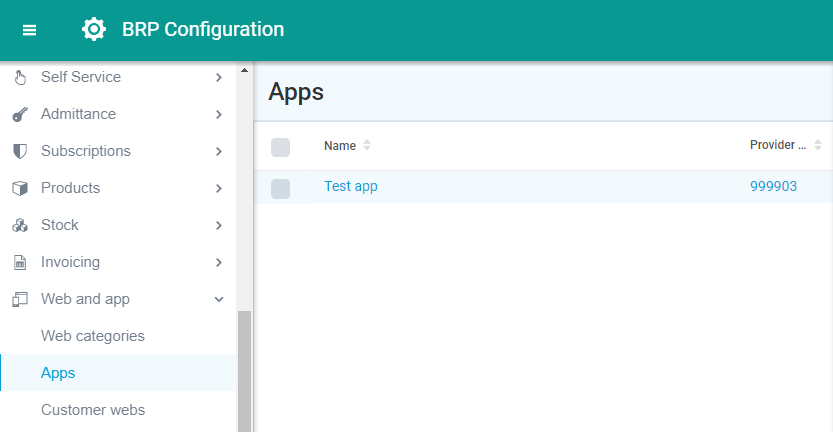
- Your BRP contact will create the app for you as shown in the image below
- In the app list you can also see the provider code that is unique to your app.
- You can now make changes to the app
Making changes to the app as a system administrator
- Your user role needs the right “Apps - Configuration” to make changes to the app.
- When you click the app row in the image above, the following options are displayed:
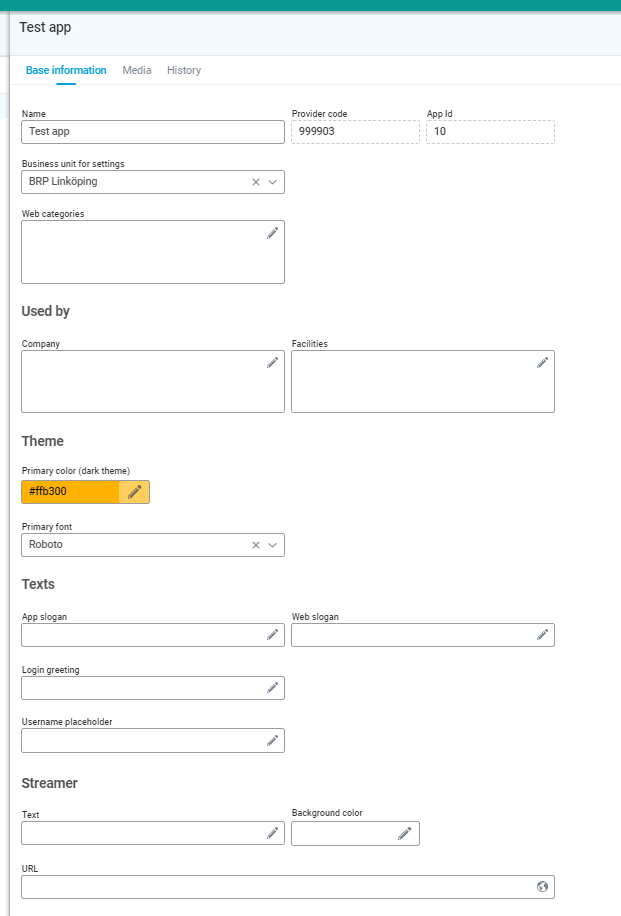
Options for the app that you can change:
- Business unit for settings
- Any facility. Usually your main facility. Used for settings that will have to be made by your BRP contact.
- Web categories to display on the app "Explore" page
- Release 1 only supports classes
- Used by (companies and facilities)
- Select all companies which products are to be available in the app
- If only some of the facilities within a company are to use the app, don't select the company but only the facilities.
- Primary color for your theme (HEX color code, or by color picker)
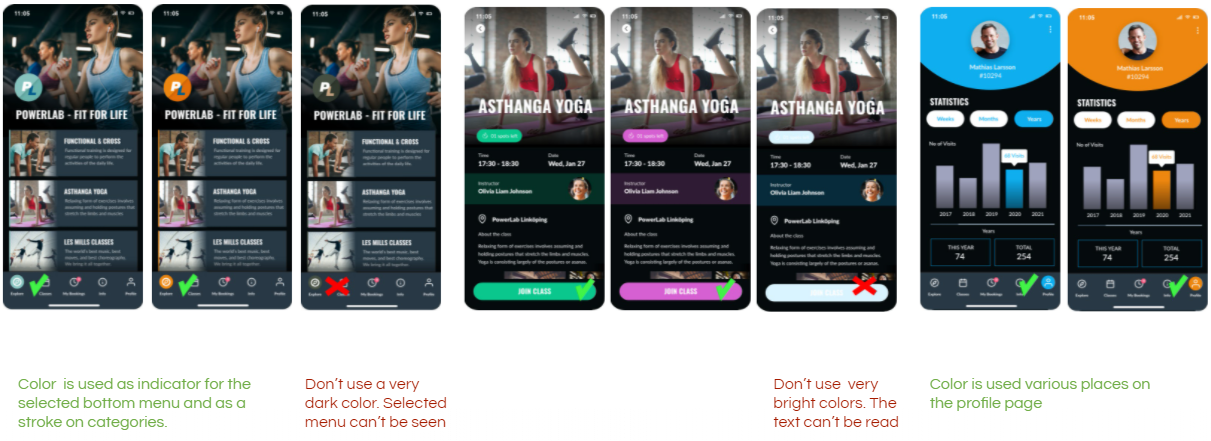
- Usually the main color from your logo
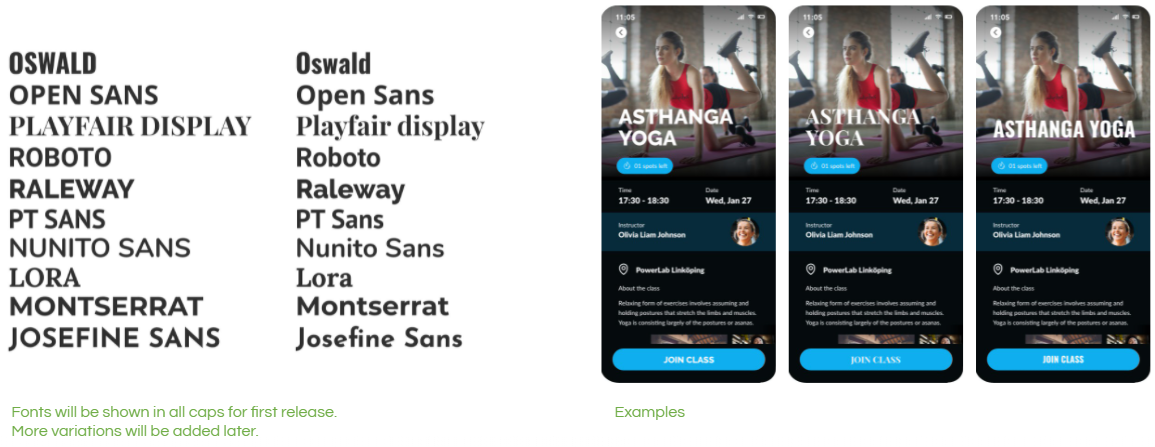
- Primary font from a selection of available fonts
- Enable functionality in the app
- Show "My pages"
- Show page for passage with mobile phone
- Texts (all texts can be entered in multiple languages by clicking the pen icon)
- App slogan (enter the same slogan in "Web slogan")
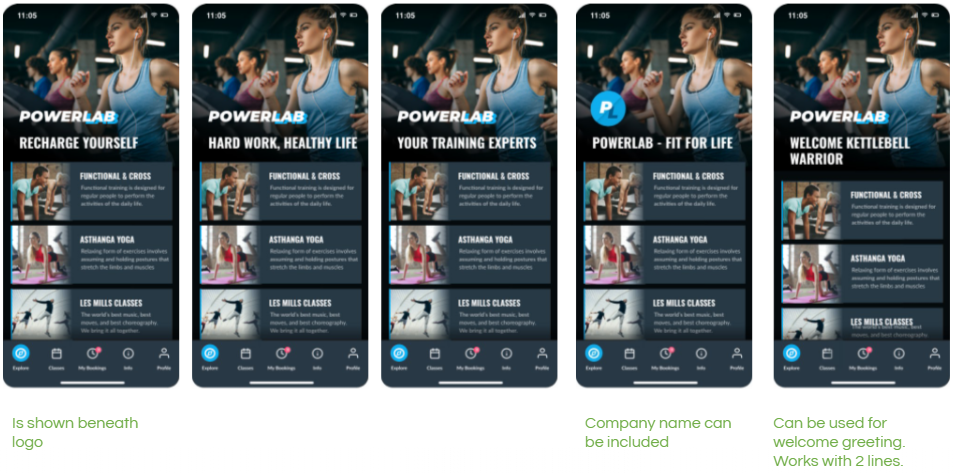
- Login greeting
- Displayed on login page "Welcome to My Gym"
- Username placeholder
- Let the user know how to enter the e-mail address or customer number for logging in
- Usually "E-mail"
- App slogan (enter the same slogan in "Web slogan")
- Streamer (only used on web)
- Streamer text
- Background color
- URL
- Image for the app "Explore" page is selected on the media tab (in the top of the form)
- Selected from a library of predefined images. In the future you will be able to upload your own images.
Setting up web categories
If you have previously used the customer web or the generation 2 app, you are familiar with web categories. If not, the following page describes how you set them up:
Options for web categories and class products
The following can be configured both for class products and web categories that are used in the app
- Image (select from the media tab on the product or web category, the same way you selected an image for the app explore page)
- If you have a Les Mills license, additional images are available, but make sure you use the Les Mills images only for their classes, or for web categories that only contain their classes.
- Description
The “Explore” shows the users that you provide a rich set of classes. Create web categories for all kinds of classes. If you want them to only show up in the new app, disable “Show on web”. The generation 2 of the app does not support web categories for classes, so if you use that app in parallell the web categories will not be visible there.
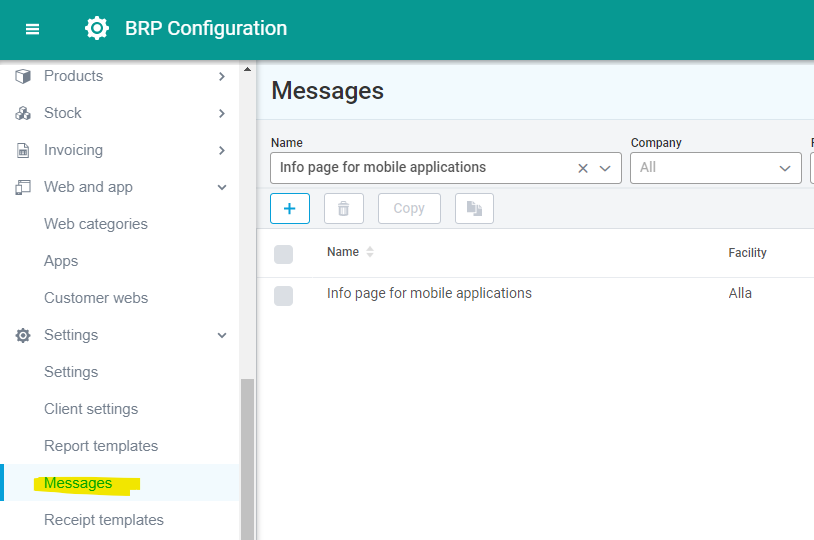
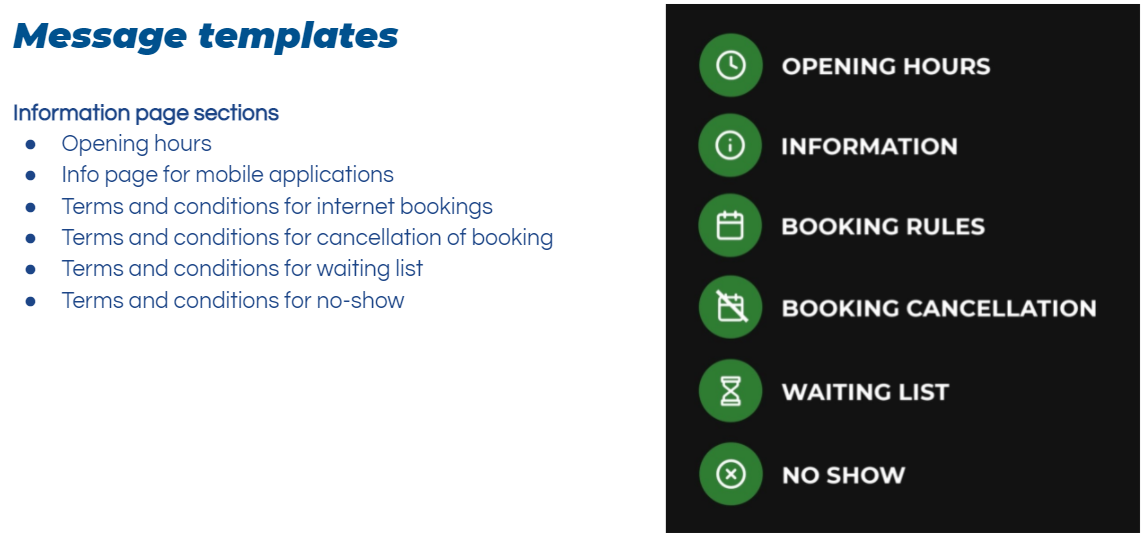
Message templates for the info page
- Change or create message templates for the six sections in the information page.
- Opening hours / Öppettider
- Info page for mobile applications / Infosida i mobilapplikation (also used in app generation 2)
- Terms and conditions for internet bookings / Villkor för internetbokning (also used on web)
- Terms and conditions for cancellation of booking / Villkor för avbokning
- Terms and conditions for waiting list / Villkor för reservlista
- Terms and conditions for no-show / Villkor för no-show
- You can create multiple message templates for the same section, depending on language and facility. For example, you can have different opening hours for different facilities, and present them differently depending on the language set on the phone.
- The templates can be plain text or HTML (for rich formatting)
Viewing changes you made to web categories or information templates in the app
When you make changes and want to see them in the app, swipe down on the explorer or info page to reload.
Accessing the app as an end user
Alternative 1 (recommended):
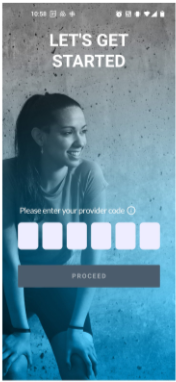
Give the magic download link for Google Play and App Store to staff and customers. It includes the provider code, and takes you to the app store for the phone you are using. The link will not work from a computer, but we are looking into creating a landing page with more information.
Publish on home page (but first make changes to the link):
- Provider code: Replace XXXXXX with the provider code
- The provider code is visible on the right side in the app list in BRP Configuration
- Fallback URL: Replace LINK with a link to your homepage. It is only used if the customer visits the link from a computer, not a mobile device.
Example:
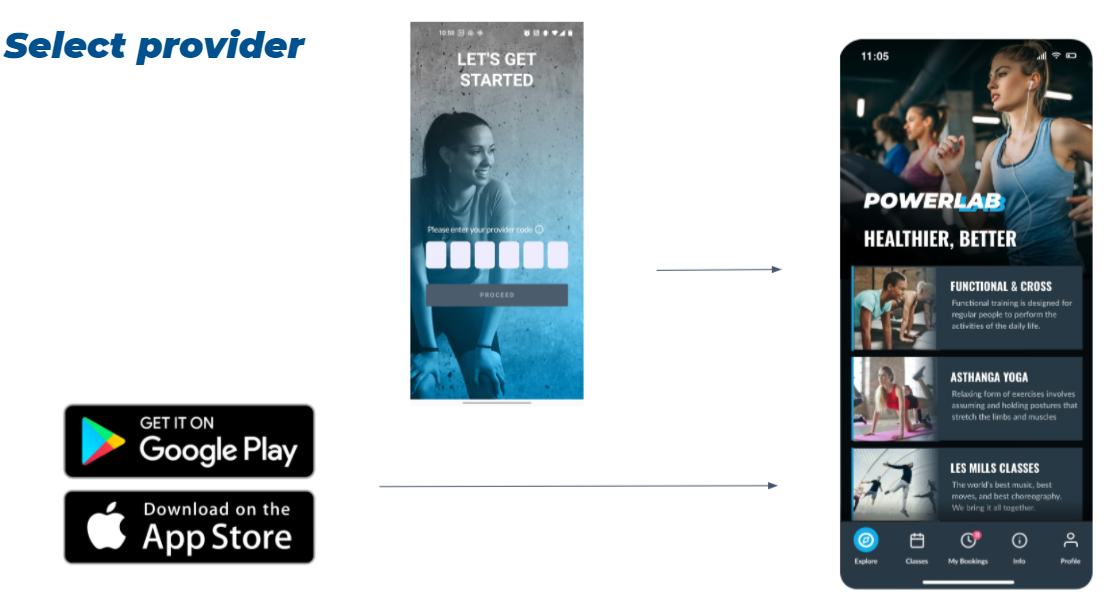
When the app is launched, the user will not have to enter the provider code.
Alternative 2:
First download the app from one of the app stores:
https://apps.apple.com/lk/app/go-active/id1553273081
https://play.google.com/store/apps/details?id=se.brpsystems.mobility
When the app is launched, enter the provider code.
Web
Most settings for the web are the same as for the app, but there are some additional options.
Functionality
- Book classes
- Buy subscriptions
- Onboarding questions
- Buy services
- Buy events
- Buy value cards
- Shopping cart
- My pages
- Payment
- Card
- Swish
- Value card
Options for the web
- Send your BRP contact a request for a subdomain that the web will be hosted on. Example https://mygym.goactivebooking.com/
- Send your BRP contact a logotype for light theme with dark text that works on a light background. This example is for the app (on which the light theme is not yet available).
- The light theme will be used on the web. May also be used in future releases of the app.
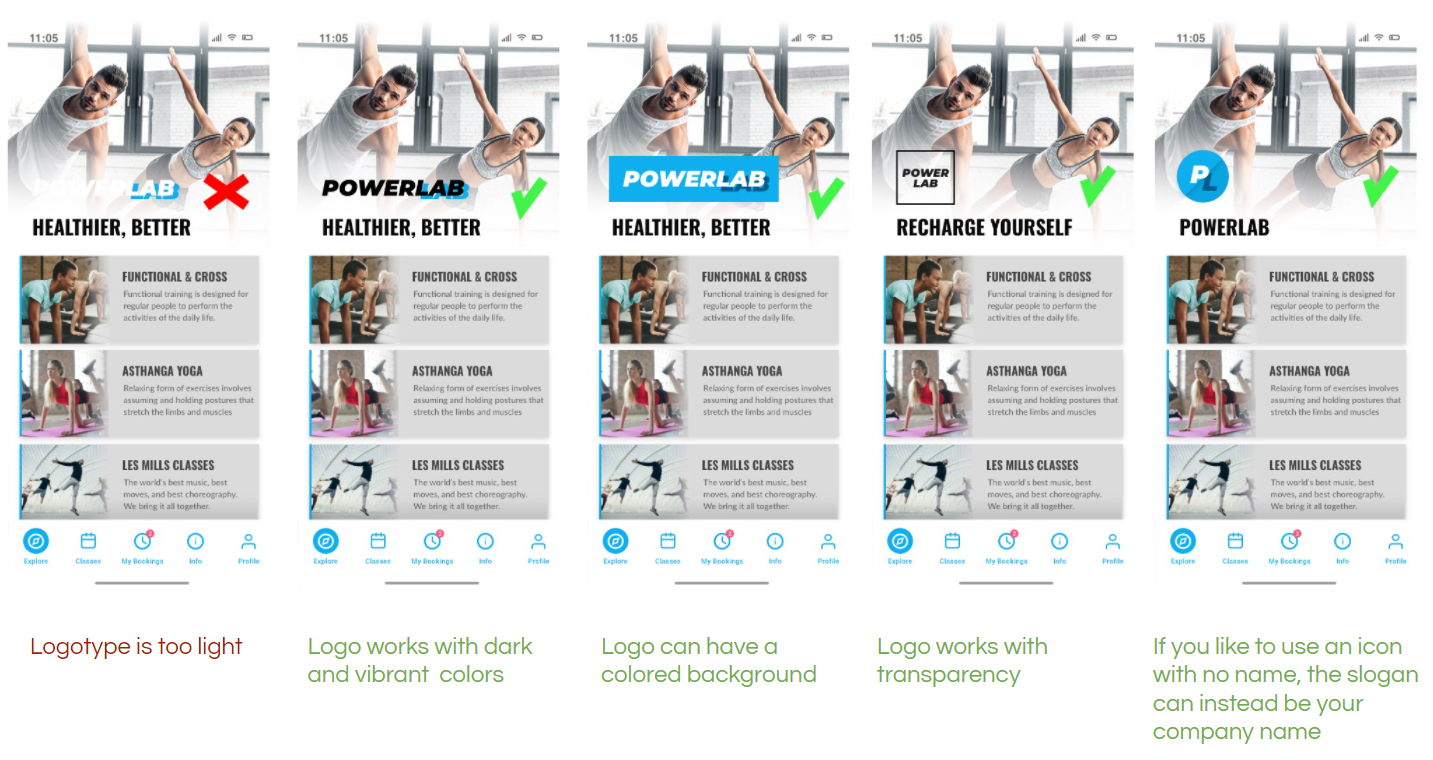
- The light theme will be used on the web. May also be used in future releases of the app.
- Primary color (light theme)
- Web slogan (could be longer than the app slogan)
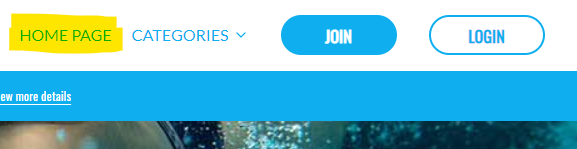
- Home page (name for the link that takes you back to the explore page - "HOME PAGE" in the image)
- Explore page (not currenty used)
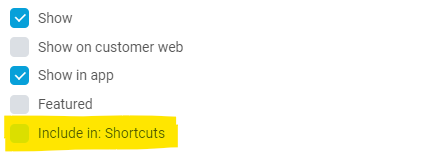
- Shortcuts (name for the web category shortcut menu - "CATEGORIES" in the image)

- Select in each web category if it should be listed in the web category shortcut menu
- Streamer
- Text
- Background color
- URL

- Currency
- Display text (example "kr")
- Display position (use after to display price "50kr")
Clear cache to see changes done with BRP Configuration
Both mobile app and web app cache data in the mobile/browser to improve the performance for the user. Some data are cached (message templates, app objects, products, ...) and some are not cached (classes, subscriptions, ...). The most usual cache time is 1 hour. That means that 1 hour is the longest time for a user to get the changed data (mean time is 30 minutes).
You don't want to wait 1 hour to see the changes that you have done with BRP Configuration. That is why you'll need to clean the cache to see the changes. That is done in different ways for the mobile app and web app.
Clean cache in mobile app
- Do your changes with BRP Configuration.
- Open the "Go Active!" mobile app.
- Click on the "Info" tab.
- Swipe down in the middle of the screen to force the mobile app to clean its cache.
- You will now be able to see your changes.
Clean cache in web app
- Do your changes with BRP Configuration.
- Navigate to the web app on your desktop browser (don't do this from you mobile phone).
- Right click at the middle of the page and select "Inspect". That opens up the "Developer tools" (1). It might be a tool window to the right or a floating window.
- Click and hold down left mouse button at the "Reload page" button (2). That will show a dropdown menu with three options.
- Click the "Empty Cache And Hard Reload" menu item (3).
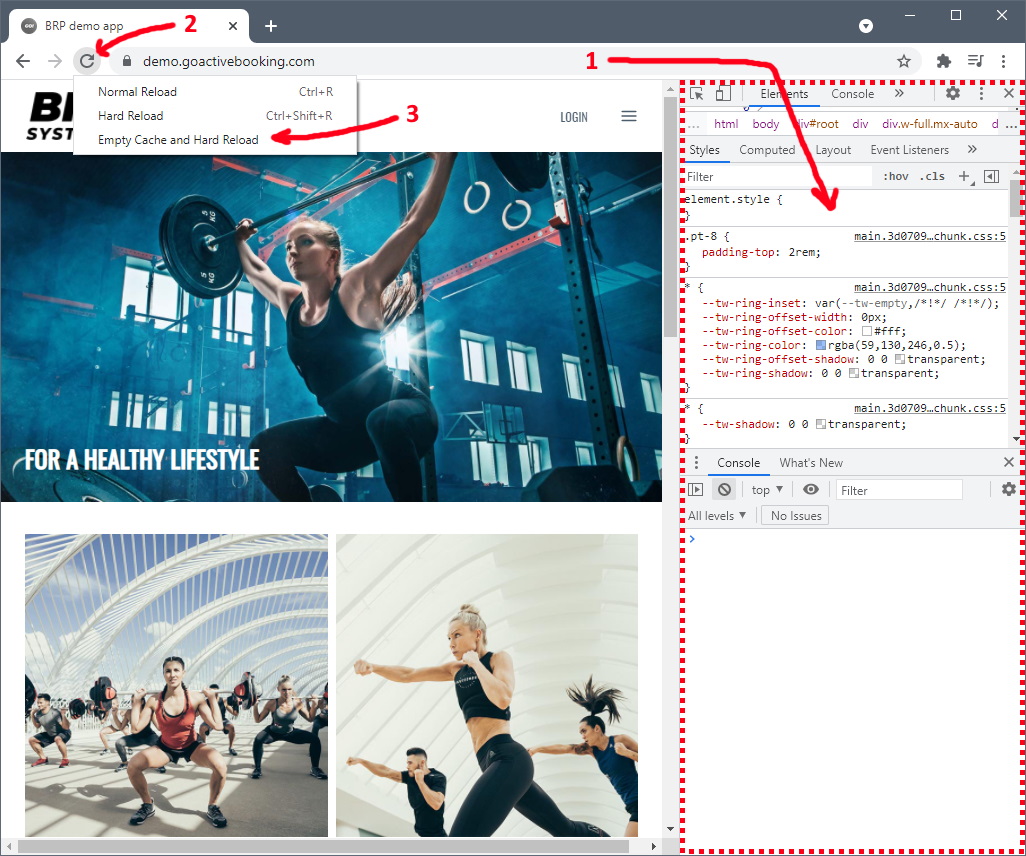
- You will now be able to see your changes.